DIY: Painted Shiba Pumpkins

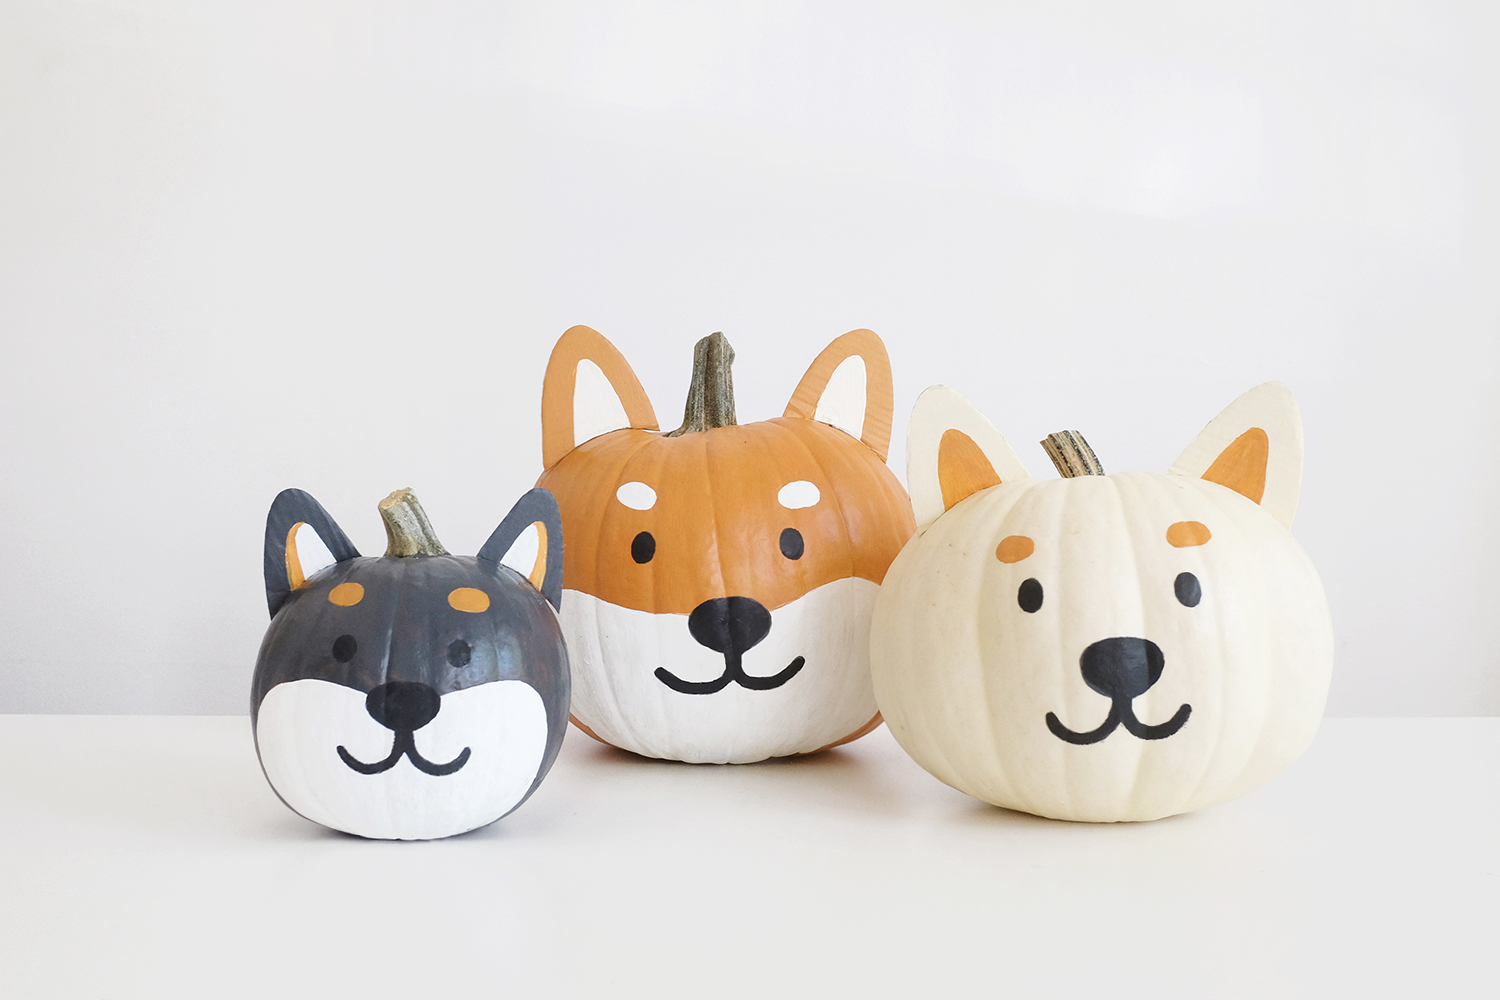
It’s officially the season of pumpkin and cinnamon-spiced-everything! Even though I’m actually not a fan of either (sorry, hardcore Fall people), I’ve always loved decorating the house with pumpkins to celebrate the beginning of the holidays. While the tradition at our house has always been to carve a pumpkin, I thought I’d try my hand at painting one (or rather, three) this year. And let me tell you, it was so much fun I might just be painting them every year from now on. (Plus, they last longer too!) Modeled after our Fox & Bagel Shiba sticker patches, this painted Shiba pumpkins DIY is super easy and guaranteed to make your front doorstep the cutest one on the block this Halloween when the trick or treaters come a-knocking.
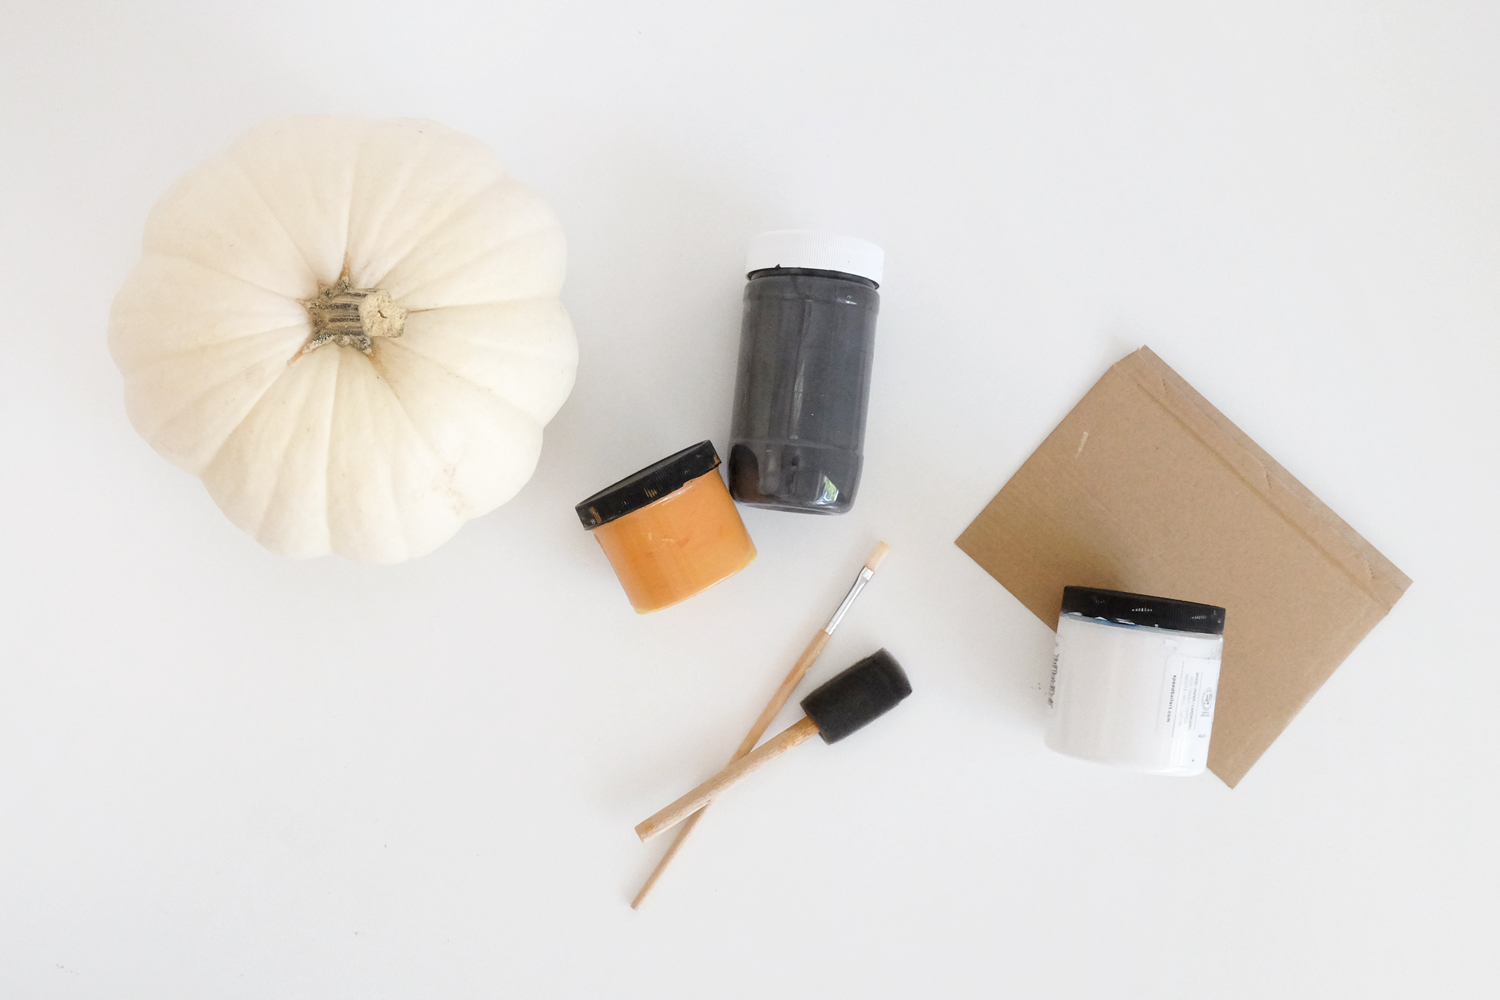
hellohoku-shibapumpkins-01.jpg

Materials

Pumpkins (I used orange pumpkins for the red and black & tan Shibas and a white pumpkin for the cream Shiba)
Acrylic Paint in Black, Orange and White
Foam Brush (for large areas)
Paint Brush (for details)
Uncoated Plain Cardboard (I used an old packaging box)
Scissors
Toothpicks
Clear Tape

hellohoku-shibapumpkins-02.jpg

Directions

Prepare your work area with newspaper or plastic.

Take your pumpkin and look for it’s best angle. This will be your Shiba pumpkin’s face. Sketch on the details (eyebrows, eyes, nose, mouth, and cheeks) lightly with a white pen or oil pencil to help guide you as you start painting. Use the foam brush to paint on the base color: black for a black and tan Shiba and orange for a red Shiba. I decided to leave my white pumpkin as it because I really loved it’s original, creamy white color! Some white pumpkins are a little more on the yellow side, so you may choose to paint over those if you wish.

Wait for the base color to completely dry before painting on the white cheeks. Once the white cheeks are completely dry, then paint on the eyes, nose and mouth. Although you will probably be tempted to carry on painting (I am totally guilty of this), this step is super important as you don’t want your paint colors to blend together and create a brownish, grayish mess on your pumpkin.

hellohoku-shibapumpkins-03.jpg
hellohoku-shibapumpkins-04.jpg
hellohoku-shibapumpkins-05.jpg

As your pumpkins dry, it’s now time to work on the ears. Take your cardboard pieces and sketch out two triangular ear shapes with a pencil. Use scissors or an X-Acto knife to cut them out. You will most likely have to make adjustments to the curved part where the ear meets the pumpkin as each pumpkin will have different grades of roundness. Paint the ears and wait for it to dry.

hellohoku-shibapumpkins-06.jpg
hellohoku-shibapumpkins-07.jpg

When both the pumpkin and cardboard ears are completely dry, do some test ear placements on your pumpkin and make any final adjustments to the curved, bottom part. Stick the toothpicks into the pumpkin where you want the ears to be placed and use a small piece of clear tape to secure them on.

And that’s all there is to it! A simple and festive DIY for any Shiba lover. Happy Fall days, everyone!

hellohoku-shibapumpkins-08.jpg
hellohoku-shibapumpkins-09.jpg

(Hoku’s definitely thinking there’s something a little odd about the three new Shibas that showed up to our house over the weekend, but can’t exactly place his paw on it.)

hellohoku-shibapumpkins-10.jpg

Shi-Boba: A DIY Halloween Boba Costume for Pups

It began over a sushi dinner five days before Halloween. David jokingly suggested that Hoku be bubble tea and I laughed, pulling out my phone to show him this brilliant Oh Happy Day boba costume I had just pinned. It's probably too ambitious to make a dog version though, I told him. But over one too many sushi rolls and a bottle of sake, we were committed, a little too tipsy/proud of the final blueprint we had sketched on the paper sleeve that once housed a pair of wooden chopsticks. By the time our check arrived, an Amazon order had been placed for costume materials...along with some saved-for-later items. (Don't drink and Amazon, guys.) 

Fast forward to Halloween and we've been floored by the response that Hoku's costume got on Instagram! I got several requests to share how it's made so I've outlined the materials and steps below. It's designed after our Fox & Bagel boba pin, hence my specific color choices, but you can make the straw and lid any color you like.

A final note. This costume is not appropriate for all dogs and is not designed for mobility. Hoku is a really chill pup and wore it with absolutely no issue at all. (He really only had it on for a few minutes for some quick photos.) We would never ever make him wear or do anything if he showed any sign of unease, so please just be aware of what your dog is comfortable with before starting on this project! 

DSC_0689.jpg

Materials

Bannister guard (plastic cup)
Poster board + spray paint (lid)
Gold wrapping paper (straw)
5" black balloons (tapioca/ boba)
Circle compass cutter
Scissors
Clear packing tape

DSC_0524_1.jpg

Let's start with the cup. Have your pup sit and use a tape measure or piece of string to make a circle around the circumference of their body in sitting position. Then measure the height from the ground to their chest. This will give you your circumference and height. Unroll the bannister guard and cut it according to your pup's measurements. Make sure there is ample room in the circumference for them to be sitting comfortably. Use clear packing tape to attach the two ends together to form a cylinder. 

DSC_0599_1.jpg
DSC_0537_1.jpg

Use the circumference of the cylinder to trace a circle on the poster board. This will be your lid. Then use a compass cutter to cut two holes; a larger one for your pup's head and a smaller hole for the straw. Make sure the larger hole has ample room for it to slip easily and comfortably over their head.

DSC_0564_1.jpg
DSC_0579_1.jpg
DSC_0614_1.jpg

You can use color poster board or paint it to get a specific color. While the lid dries, start blowing up your 5" black balloons. Make sure the balloons are small and round. 

DSC_0606_1.jpg

After your lid is thoroughly dry, attach it to the top of the plastic cup using clear scotch tape on the inside. Leave a small section untaped for adding in the boba balloons later. Then cut a semi-circle at the lower rear of the plastic cup for your pup's tail.

DSC_0640_1.jpg

Try it on your pup to make sure everything fits properly. 

DSC_0720_1.jpg
DSC_0690_1.jpg

Carefully insert the straw and add the balloons, either from the small untaped section of the lid or from the bottom of the cup. And that's it. Have fun!

DSC_0738_1.jpg

Recipe & DIY: Peanut Butter & Pumpkin "Name" Cookies

PBP_3.jpg

VIEW FULL RECIPE & DIY

Dusting off the old blog today with a recipe for Peanut Butter & Pumpkin dog treats, from My Baking Addiction. I was really excited to use my new dog bone cookie cutter and letter embossing set to personalize each cookie with Hoku’s name.

Aside from the dough being a bit sticky which made it a little difficult to stamp out the shapes, the recipe itself is really simple. I always appreciate a good dog treat recipe that uses only a few human-grade ingredients. I’d definitely suggest keeping a bowl of flour nearby for dusting the cookie cutter before every cut as well as for dusting the rolling pin.  

Hoku wouldn’t leave my side the entire time I was making these because I must say they smelled so amazing. (And to my amusement, the flour in the air kept making him sneeze!) After waiting patiently for the treats to bake and cool, Hoku finally got his chance to gobble down FOUR of his special name cookies, because hey it’s the weekend before Christmas!